Saturday, November 1, 2014

Wicked Halloween 10K - Frozen Head in the Freezer

Race: Wicked Halloween 10K
Race Date: Sunday, October 26th, 2014
Distance: 10K
Time: 59:07 (9:32 mile/pace)

Equipment
  • Foam core sheets x 6
  • White duct tape x 4
  • Fridge decorations 
    • Bag of chips
    • Empty cereal box 
    • Dry erase board
    • Frozen dinner boxes
    • Ice cream sandwich box
    • Kid's drawing
    • Wooden letters
  • Head bandage 
  • Black and white cream makeup
  • Tacky glue
  • Shiny white fabric

Creating the Structure
Taking pieces of white foam core, I trimmed down and taped together the edges of the pieces to create the bottom and top half of the fridge. It was important to make sure the fridge wasn't too tall or else it would hamper my stride and I wouldn't be able to run very well.   The sides had arm holes cut out; I was debating about putting in the arm holes, but if I fell it would be better to break the fall with my hands rather than my face.

I went with foam core instead of a cardboard box because the former is sturdier, and I needed sturdy for the race.

Once everything was taped together, the whole thing was wrapped with white duct tape. Besides making it water-resistant, this would help keep the costume together while out running.

Decorating the Freezer
For the freezer section, I glued down some shiny white fabric along the insides. The fabric was the most expensive piece out of the whole thing. Once that dried, I added a couple boxes of frozen dinners and a box of ice cream sandwiches (yum!)

A box of cereal and a bag of chips was glued to the top.

Decorating the Fridge
A piece of thin cardboard was wrapped in duct tape and added to the front for the handle.

A co-worker's kiddo drew the drawing and donated the letters and the star magnet. The dry erase board was glued on along with a clip. My original thought was to have the clip hold the bib, but then I worried that my bib would blow away!

A piece of paper with the words "Is this refrigerator running? Well you'd better run and catch it!" was added to the back.

Completed fridge


Remember to pick up milk.


The freezer part where my head goes. Love this fabric.


Message taped to the back of the fridge.

 The other touches
Being a severed head, my noggin had a bloody bandage and white and black makeup.

Racing as a fridge!
When I first put on the costume, a kiddo in the mini van next to my car burst out laughing. That right there made all the effort worth it!

While my arm movement was limited and I had no peripheral vision, this was pretty easy to run in! The costume sat well on my shoulders and I didn't have to hold anything up. Not having to hold anything makes running in a bulky costume much easier. As this was a road race, there was plenty of room to maneuver around.

I wondered how people would take the joke on the back of the fridge but they seemed to get a kick out of it. One woman told me that she tried to catch me and thanked me for the motivation. That made my day!

This costume won the individual costume contest, but it must've been a very close call because second place was a kid as Fred Flintsone, prehistoric car and all. It was an amazing costume!

Lots of people dressed up for this race and were looking fabulous -  I had a blast!

Finishing the 10K!


Saturday, June 14, 2014

Canton Liberty Run

Race: Canton Liberty Run
Race Date: Saturday, June 14th, 2014
Location: Canton, Michigan
Distance: 5K


Equipment
  • Sweater with beaded fireworks
  • Red and blue socks
  • Decorated Jazzy Jorts (jean shorts)
To help kick things off at the Canton Liberty Festival, the event hosts a 5K and 10K race Saturday morning. This year was tehre a theme contest for striped costumes, starred costumes, and decorated jorts (jean shorts.) Most of the people I saw went with the jort theme.

I decorated my jorts with some bows from the dollar store, felt stars super glued on on the front. For the back, I wrote the name of the race with glitter pens, and drew the Statue of Liberty in green fabric ink. Both the Statue and the glitter pen writings took a full day to dry.

I'd never run in jorts before, so I played it safe. I wrote running shorts under the jorts (is that cheating?) and lubed up the inner thighs with BodyGlide.

Build for speed.
Photo by Greg Sadler Photography

The weather was a little cool that morning - in the low 50s - which was lucky! My sweater was making things a little toasty. But I felt that I was channeling freedom and that's what mattered.
 
And we're off!
The 5K spends around a mile in the park near the end of the race, which was shaded had a nice wide path.There are a couple of baby hills but the course is mostly flat.


After the race, I went home, changed clothes, and Jason and I came back to spend a few hours at the festival. Had a great time at both the race and the festival!

Thursday, April 3, 2014

Twinkie 5K

Race: Twinkie 5K
Race Date: Tuesday, April 1st, 2014
Distance: 5K
Time: 23:28 (7:34 mile/pace)

Equipment
  • Twinkie costume!


The Twinkie 5K is a race presented by Ann Arbor Active Against ALS to raise funds for Lou Gehrig's Disease research. 100% of the profits for this race go towards finding a cure, which is great!

My costume is by the brand Rasta Imposta and bought off of Amazon for $20. The day was awfully windy and it worked pretty well as a wind breaker.

Trying on the Twinkie! I ironed this costume before the race. Have to keep up appearances.


Let's talk Twinkies.  Every runner has two chances during the run to eat a Twinkie. Once at the start when the horn goes off, and again at the mid-way point. Each Twinkie deducts a minute off your time; a good chunk of time for a 5K! Seeing as I was a Twinkie, eating a Twinkie seemed like cannibalism.  Although, the post-race grilled Twinkies sounded pretty good.

The race does not have timing mats but does keep tracking of a runner's finishing time and factors in the number of Twinkies a runner has ingested.

I'm amazed how fast people can stuff an entire Twinkie in their mouth. Although, I did see a few half-eaten Twinkies along the trail.  A woman mentioned her dog was cleaning up the trail from the mislaiden golden goodies. Perfect way to clean up the path.

The route goes around the beautiful Gallup Park twice. We were lucky to have it warmer than last year, but we did have to fight the wind at times. Made for an excellent challenge! Also the Gallup park trail has a wood chip bit that feels delightful on the feet.
 
I really enjoy the vibe of this race, and it's for a good cause to boot. Definitely worth doing if you get a chance!

Saturday, March 22, 2014

Saint Patrick's Day Leprechaun Costume

Another illusion costume, this time with some Saint Patrick's Day theme!

Race: Shamrocks and Shenanigans
Race Date: Sunday, March 9th, 2014
Distance: 5K
Time:  27:30 (8:52 min/mile)

Race: Kona St. Patrick's Day Run
Race Date: Sunday, March 16th, 2014
Distance: 5K
Time: 27:03 (8:41 min/mile)

Equipment
    • Foam board
    • Several rolls of Duck Tape
    • Cardboard
    • Kid sized green pants
    • Kid shoes
    • St. Patrick's Day themed cloth
    • Dowels
    • Tacky glue
    • Parachute pins
    • Polyfill
    • Plastic green pot
    • Green glitter pen
    • Gold glitter pen 
    • Gold coins
    • Leprechaun vest
    • Wig (I used a tinsel wig for Shamrocks and Shenanigans, bright green wig for Kona)
    • Various shamrock accessories (gloves, socks, rings, etc.)
First step was to create the field to support the lower half of the leprechaun.

I cut out a hole in the middle of the board that was a little smaller than my waist. It was a tight squeeze to get in and out of the board, but this way the board could rest on my hips.


Because there were only a few inches between myself and the cardboard, I used strips of cardboard to reinforce the board.

Adding a little side support.

Next, I wrapped the entire table in duck tape. This helps to keep the piece water-proof; you never know what kind of weather you'll get for race day in Michigan!

I purchased a yard of Saint Patrick's Day cloth from a fabric and spread it out on the floor with the back of the pattern facing the ceiling. I centered the foam board over the cloth with the long edges in the front and the back.

To open the now-fabric-covered hole, I cut the cloth into strips and duck taped down to the bottom of the board.

Adding the opening through the fabric.
Once I done with the opening, I flipped the board back over. I ran tacky glue along the edges of the board and pressed down to secure the fabric.


Drying table.
Two dowels, one on each long side, were added to help support the table. I found the pot o'gold and the plastic mug were enough to buckle the table a bit and make it droop.

Duck taped dowels.


Now for the pot o' gold!


The pot was decorated with the word "LUCKY" and in shamrocks with green and gold glitter pens.


For the top of the pot, I cut out a circular piece of cardboard that was the same size as the rim of the plastic pot. I covered it with duck tape, again for weather reasons.


This piece was covered in gold coins that I picked up from the dollar store, secured with tacky glue.

To secure to the table, I used tacky glue and a couple of parachute pins. The glue might have been enough, but I really didn't want to lose the pot 'o gold!

Once the pot was secured, I filled the pot with polyfill and glued the top piece covered with coins to the top of the pot.
Filled with polyfill.

Now for the legs! The pants and shoes came from the thrift store, the socks from a grocery store.


I was lucky - I found kids' running shoes in green!

Running shoes in green!

I placed the socks into the shoes and stuffed them with polyfill. I then filled the pants with polyfill and sewed them to the socks. The top of the pants were sewn shut.

The shoes were glued to the edge of the foam board. The pants were glued right near the opening, and were also sewn to the table (had to use a big needle for that!)


To decorate the rest of the open space, I added a garland to the back of the table. A green plastic mug was added to the front, and gold coin were scattered around the pot o'gold and along the edges.


Testing the table part out!
 
For the wearable pieces of the costume, I had a wig, a shamrock headband for one race and a tiny hat (I love tiny hats) for the other, a bowtie, shamrock gloves, shamrock socks, and of course the leprechaun jacket.

At the Kona St. Patrick's Day race entering the costume contest. It was freezing!

This costume won first place at the Kona St. Patrick Day's race. I won a spiffy glass mug!

Modeling the shiny new mug!


Wednesday, January 1, 2014

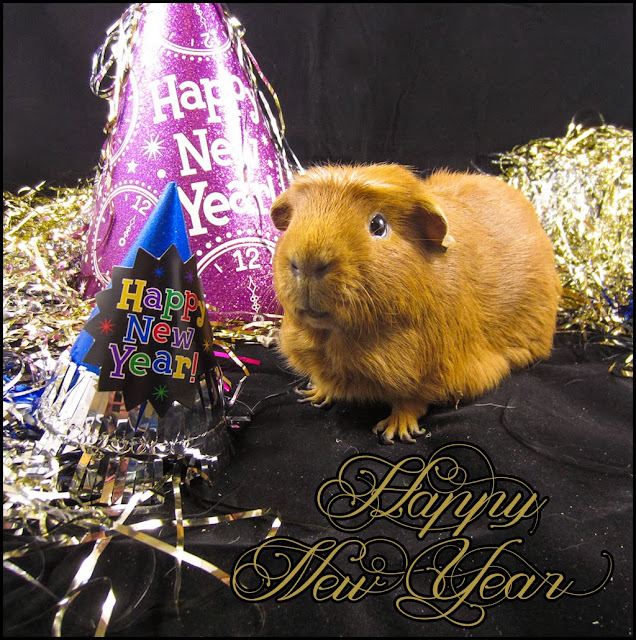
Happy New Years!

Party piggy Apollo!

Cheers from Edgeworth.

Gruden von Squeakycheeks wishes everyone and everypig a wheeky new year!

Wednesday, December 25, 2013

Merry Pigmas!

Happy Holidays from the piggies Edgeworth, Gruden von Squeakycheeks, and Apollo!
Merry Pigmas from Gruden von Squeakycheeks!


Little Dummer Pig Apollo

Hello birdie

Happy Holidays from Edgeworth!

*wink*


*yay pigmas!*

Tuesday, December 24, 2013

Thanksgiving Turkey Dinner Costumes Makes Michigan Runner Magazine!

I was lucky enough to have Tracey Cohen take a picture of my Thanksgiving Dinner costume for her Ann Arbor Turkey Trot article, which has been published in the January / February 2014 Michigan Runner magazine! It's on page 24 of the hard copy, page 43 of the online copy, the latter of which is available here: http://issuu.com/michiganrunner/docs/mr0114/42 !


Delicious turkey dinner.